The main point of this blog is to share my adventures in the kitchen with you, and 99% of the time I will stick with such topics. But today instead of a Friday Links post I wanted to share with you my thoughts on buying local produce, as well as the benefits it brings to everyone involved.
*Disclaimer: I know my thoughts on eating healthier may seem like an oxymoron considering the amount of sugary treats I feature on this blog. But do know that I believe balance is key. Sure, enjoy that slice (or two slices) of Italian Cream Cake, but then also balance that out with a lighter dinner. One can't subsist on cookies and cake alone, and fresh fruit and veggies are a great way to balance out a sweet tooth.
Okay, so back to my little soapbox. Everyone knows that eating fresh fruits and veggies is better for you, but so often this isn't done because it is simply is more expensive to purchase those fruits and veggies than it is to pick up that cheap bag of Lays. And not only does fresh produce cost more, but it also doesn't have anywhere near the shelf life of processed food. Those twinkies will stay good for YEARS, but those grapes in the fridge will go soft in about a week and then you have to toss them.
I certainly can't argue that produce from the grocery store doesn't drain your wallet, but I believe the exception is produce from your local farmer's market. Buying local not only supports a business in your own community, but it also allows you to purchase this precious produce at a much lower cost. This is possible because the food isn't marked up to account for additional costs including marketing and shipping.

Friday, March 30, 2012
Thursday, March 29, 2012
Turkey Burger Patties
Yesterday I posted my recipe for whole wheat hamburger buns, and today I'm sharing the recipe for the turkey patties that accompanied those nice, fluffy buns. These patties are pretty basic and are incredibly easy to make, but one thing they're not short on is flavor.
The good thing about these is that you can certainly spice them up depending on the flavor you want. If you like a little extra heat go ahead and add some red pepper flakes, or add some soy sauce for a little tang.

The only change I made from the original recipe is including the whole egg, versus the two eggs whites only that were initially called for. The egg yolk serves as a binder and holds the patties together, which you definitely need with these burgers. They tend to get very slimy on you, so handle with care so they don't fall apart. A spatula will quickly become your friend when handling these patties because it makes it so much easier to maneuver them.
The good thing about these is that you can certainly spice them up depending on the flavor you want. If you like a little extra heat go ahead and add some red pepper flakes, or add some soy sauce for a little tang.

Top them off with a few slices of tomato and some
lettuce and you're good to go!
The only change I made from the original recipe is including the whole egg, versus the two eggs whites only that were initially called for. The egg yolk serves as a binder and holds the patties together, which you definitely need with these burgers. They tend to get very slimy on you, so handle with care so they don't fall apart. A spatula will quickly become your friend when handling these patties because it makes it so much easier to maneuver them.
Wednesday, March 28, 2012
Whole Wheat Hamburger Buns
I know hamburger buns aren't really high on most people's list of things they'd like to spend their time making for dinner, but I was curious to see just how different homemade buns would be from the packaged kind sold in stores. Don't get me wrong, I don't discriminate when it comes to any kind of bread.....sliced bread, the bread basket at Red Lobster, breakfast breads.....and I've certainly never turned my nose up at packaged buns. But since I had the time I thought I'd give these a shot.

And as much as I hate to admit it, I LOVED these. Their texture is very different (in a good way) and they have a lot more flavor.
Yes, they require more time than simply removing the twist tie from a plastic bag, but if you can spare the time I would highly recommend it. I know it's not highly likely that these would be made on a busy weeknight, but you can always make them on the weekend since they keep fresh. Or you can make the dough and freeze it until you're ready to use it.
The original recipe called for all purpose flour, but I used wheat flour and actually believe it added to the flavor of these buns. I also decreased the amount of flour from what was called for. I found that the original quantity (5 1/2 C) was way too much and made the dough really dry and hard to work with.
These buns can be paired with any type of meat (beef, turkey, salmon, etc), but I made turkey patties to go with them. I'll post those tomorrow, so make sure to check back!
Tuesday, March 27, 2012
Tuesday's Tips, Tricks and Tid Bits ~ Cutting Butter Into Biscuits
Today's post is an incredibly short and simple one, but it's one that is very near and dear to my heart. Okay, maybe that's a little dramatic. But I do truly find this tip I'm about to mention to be one of the best ones I've discovered during my few short years of baking.
If you've ever tried to cut butter into a flour mixture for biscuits or a pastry you know how cumbersome this process can be. Even if you have a pastry cutter it can still be quite frustrating. If the butter gets too warm (FYI you're always supposed to use chilled butter with biscuits) then it begins to clump together instead of separating into pea sized bits like it's supposed to.
After one (okay, several) frustrating goes with this very scenario I decided that it might be a good idea to come up with a better solution. You can also use a food processor to cut the butter into a flour mixture, but I really didn't want to drag mine out and then have to wash it. I know that sounds so incredibly lazy, but the last thing I want to do after cooking a scrumptious meal and sitting down to enjoy it is tote myself right back into the kitchen to wash 10+ dishes.
Monday, March 26, 2012
Monday Meltdown ~ Irish Car Bomb Brownies
I simply can't help myself, and must first start off this post by mentioning Mad Men's season premiere last night....did anyone else watch?? LOVED it. The actual show is fabulous, but the fashion is such though that I almost find myself distracted from the actual story line. How wonderful would it be to have Betty Draper's wardrobe? Or Joan's amazing pink dress from last night's episode with its beaded sleeve cuffs. Let's just meditate on that for a second.....
Okay, so back to what this blog is actually about (food). I REALLY wanted to like these brownies. I had originally seen them on Pinterest (surprise, surprise) and had been drooling over them for about a month in anticipation of St. Patrick's day. I made Irish Car Bomb Cupcakes last year and they turned out wonderful. I was initially hesitant of all of the alcohol and the resulting flavors, but the combination of Guinness, Bailey's and Irish Whiskey was a real winner.
But these didn't turn out as such. The texture of the brownies was okay, and the the Bailey's cream cheese mixture was even pretty good. But the Irish Whiskey ganache just killed the whole thing. Yuck. And this is coming from a girl who enjoys a Jack and Diet on occasion.
I'm not sure if the amount was off or what, but it was so bad that I wouldn't even consider trying to make them again to try and play with proportions. Put it this way....it was so bad that when I gave Trey a bite to try (I hadn't yet tried them myself and didn't realize the agony I was about to put him through) he mustered the best face he could and politely waited until I had left the room to spit it out :( To say the ganache tasted like tar is about the nicest thing I could say about them.
I normally share recipes on this blog, but on this occasion I think I'll pass. Unless that is you're wanting to take a tasty treat to someone you clearly despise. But I will share a few photos of the mishap....
Friday, March 23, 2012
Friday Links
Oh Friday, how I love you. And oh how much I love the below links (and their gorgeous photos) as well.
One of the things I've enjoyed most about this blog is that it's made me check out other food blogs out of curiosity. It is unbelievable how much talent is out there, both with regards to recipes and photography. The confections that some of these guys and gals dream and whip up are both creative and original, and sometimes make we want to lick my computer screen.
These below dishes are just a few things I'm craving this week and/or am hoping to make here in the new future :)
Make sure to click on the link for each of the photos to get the recipe and more pics from these amazing bloggers!
None of the below photos are mine. They have been posted *with prior permission from the original source* and include the correct citation and link.
Thursday, March 22, 2012
Savory Sweet Potato Fries
I recently had some A-mazing sweet potato fries at Recess, a local restaurant in Gainesville. I've had them a few times before in other settings and enjoyed them, but these were sprinkled with what tasted like a combination of cinnamon and brown sugar.
I know, I know.....coating them in such delicious things kind of takes the healthy factor out and basically negates the whole point of using sweet potatoes versus baked potatoes. But I promise that if you just could have tasted them you wouldn't have cared either.
I wanted to re-create these little guys, but I knew I wanted to bake them versus frying them. These fries turned out to be easy to prepare, and they have both a sweet and savory component. The sweet potatoes let you count them as a veggie, while the brown sugar and cinnamon makes you feel like you're indulging a little.
The only changes I would make next time would be that I would make the fries slightly bigger and I would have spaced them further apart on the baking sheet. When they get too crowded they end up soggy instead of crisp.

Wednesday, March 21, 2012
Soft Almond Sugar Cookies
**UPDATE: A few commenters noted that they had issues with the cookies spreading a bit more than what was depicted in the photos. A few also mentioned that the cookies were a bit on the salty side. I've revisited this recipe as of tonight, 11/12/2012, and have posted a new and improved version that gives you the soft, chewy cookies you're seeing in the photos. A little more cake flour and corn starch, and a little less salt fixed the issue. Thank you so, so much for your patience :)
This past weekend the hubby and I went to eat Sunday lunch with my family. My mom and sister were in charge of the salad and lasagna (both were amazing by the way) so that left the dessert to me. I always love whipping up anything with sugar, so this was fine with me :)
I had originally planned on taking Irish Car Bomb Brownies, but those were a HUGE flop (I'll share more about that later this week). So I was back to square one. I didn't want anything super heavy since we were already eating lasagna, and I thought about doing a cookie since I haven't blogged many such recipes.
I feel like the sugar cookie is something that, for the most part, everyone loves. Some people have different aversions when it comes to things like oatmeal raisin (raisins? ew!) or chocolate chip (some like thick and fluffy, others like thin and "greasy"), but no one can really complain when it comes to good 'ole plain sugar cookies.
I like my sugar cookies thick, fluffy, chewy and soft. Cornstarch is an ingredient that keeps baked goods from spreading, so I knew I wanted to add some into this recipe to keep the cookies from getting too flat. I played around with the proportions and ingredients (using both cake flour and all purpose) and settled on the recipe below.
I love me some almond flavoring, but you could definitely flavor these to your liking. I love the twist that almond extract gives these cookies, but using another extract won't affect the texture of the cookie.

I'm not trying to toot my own horn, but these are the best sugar cookies I've ever had. No lie. I made them pretty small, but I'm sure you could make them larger if you were willing to adjust the baking time.
Enjoy!
Soft and Chewy Almond Sugar Cookies CCK Original
(Printable Recipe)
1 1/2 C white sugar
2/3 C unsalted butter (cold)
2/3 C shortening (room temp)
2 eggs
2 tsp almond extract
2 3/4 C cake flour
1 C all purpose flour
1 Tbsp cornstarch
2 tsp baking powder
1/2 tsp salt
sugar in the raw (I like raw sugar for this, but any coarse sugar or sprinkles would work)
Preheat oven to 350 degrees and prepare baking sheet.
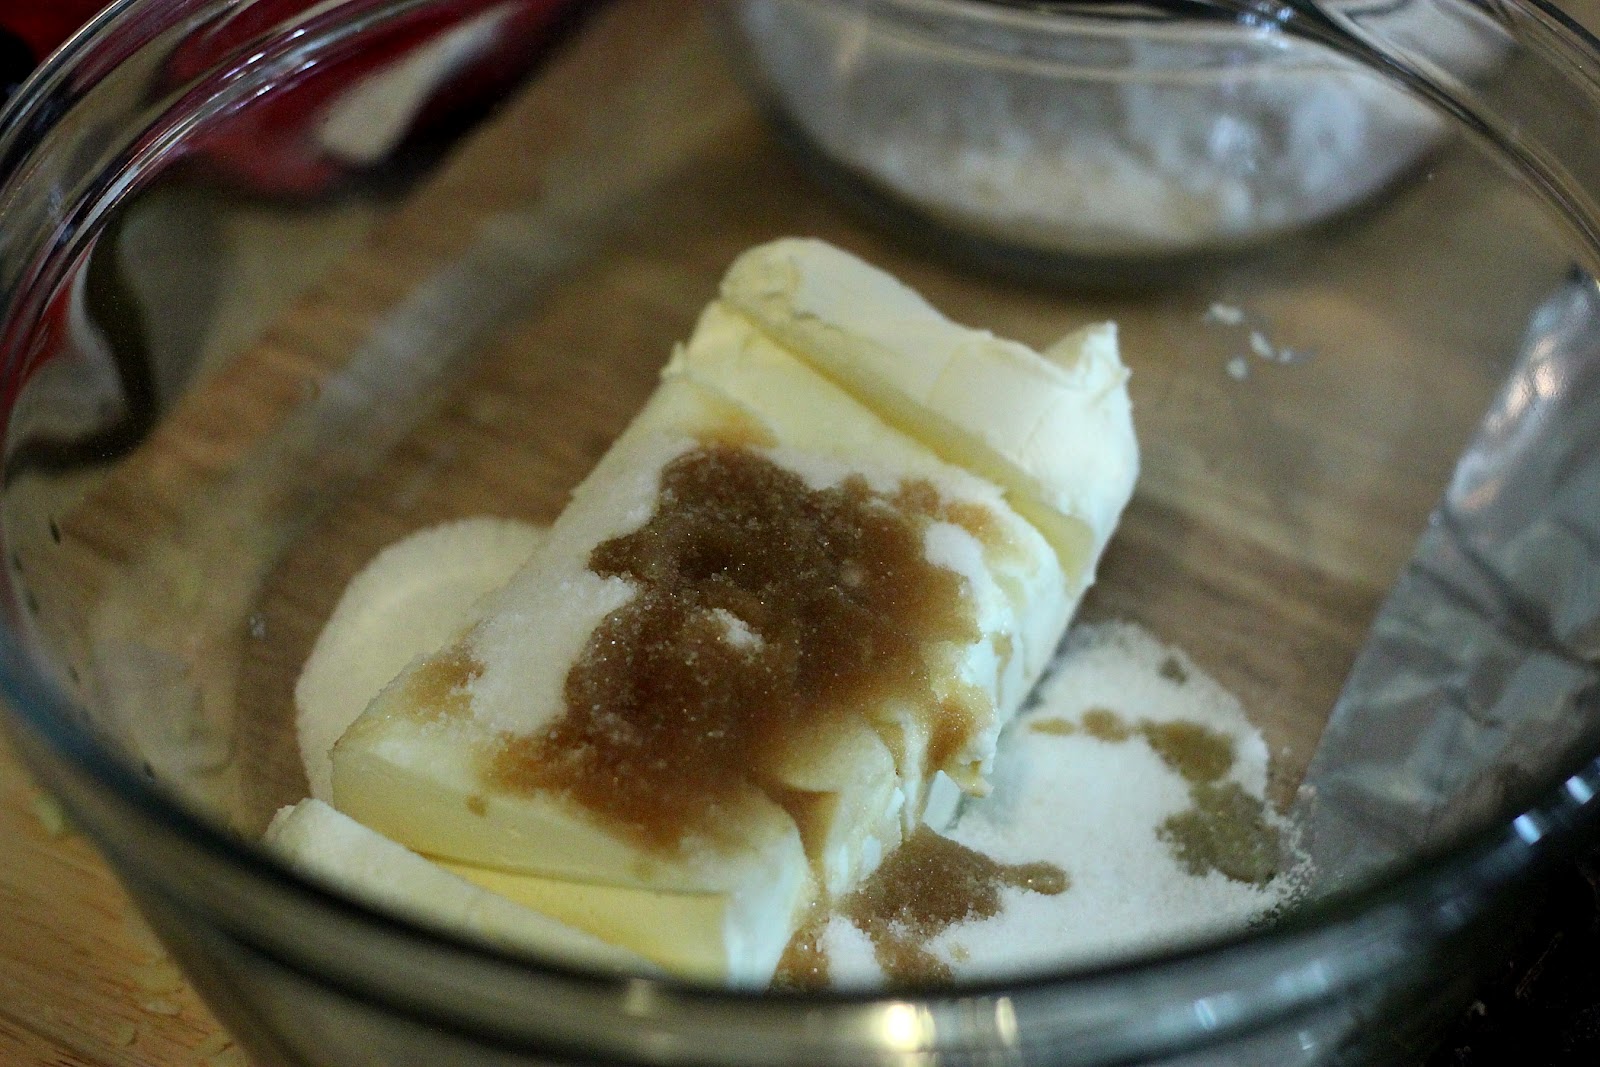
Cream sugar, butter and shortening. Stir in eggs and almond extract. Combine flour, cornstarch, baking powder and salt and add to butter/egg mixture.
Use electric mixture to ensure dough is thoroughly combined.
Chill dough in fridge for 30 minutes.


Roll 2 tsp of dough (I used a small cookie scoop to make things easier) into a ball and roll in raw sugar. Place on prepared pan.


Bake cookies for 7 minutes. Remove from oven and gently press the tops of the cookies flat with the back of a spoon while they are still warm and pliable. (The cornstarch keeps them from spreading so they will be mounded up).
Return bowl of dough to fridge in between baking batches.
Remove to cooling rack. Allow to cool completely.


A tip:
~DO NOT bake longer than 7-8 minutes!! They may seem under-baked, but when they cool they will firm up.
This past weekend the hubby and I went to eat Sunday lunch with my family. My mom and sister were in charge of the salad and lasagna (both were amazing by the way) so that left the dessert to me. I always love whipping up anything with sugar, so this was fine with me :)
I had originally planned on taking Irish Car Bomb Brownies, but those were a HUGE flop (I'll share more about that later this week). So I was back to square one. I didn't want anything super heavy since we were already eating lasagna, and I thought about doing a cookie since I haven't blogged many such recipes.
I feel like the sugar cookie is something that, for the most part, everyone loves. Some people have different aversions when it comes to things like oatmeal raisin (raisins? ew!) or chocolate chip (some like thick and fluffy, others like thin and "greasy"), but no one can really complain when it comes to good 'ole plain sugar cookies.
I like my sugar cookies thick, fluffy, chewy and soft. Cornstarch is an ingredient that keeps baked goods from spreading, so I knew I wanted to add some into this recipe to keep the cookies from getting too flat. I played around with the proportions and ingredients (using both cake flour and all purpose) and settled on the recipe below.
I love me some almond flavoring, but you could definitely flavor these to your liking. I love the twist that almond extract gives these cookies, but using another extract won't affect the texture of the cookie.

I'm not trying to toot my own horn, but these are the best sugar cookies I've ever had. No lie. I made them pretty small, but I'm sure you could make them larger if you were willing to adjust the baking time.
Enjoy!
Soft and Chewy Almond Sugar Cookies CCK Original
(Printable Recipe)
1 1/2 C white sugar
2/3 C unsalted butter (cold)
2/3 C shortening (room temp)
2 eggs
2 tsp almond extract
2 3/4 C cake flour
1 C all purpose flour
1 Tbsp cornstarch
2 tsp baking powder
1/2 tsp salt
sugar in the raw (I like raw sugar for this, but any coarse sugar or sprinkles would work)
Preheat oven to 350 degrees and prepare baking sheet.
Cream sugar, butter and shortening. Stir in eggs and almond extract. Combine flour, cornstarch, baking powder and salt and add to butter/egg mixture.
Use electric mixture to ensure dough is thoroughly combined.
Chill dough in fridge for 30 minutes.


Bake cookies for 7 minutes. Remove from oven and gently press the tops of the cookies flat with the back of a spoon while they are still warm and pliable. (The cornstarch keeps them from spreading so they will be mounded up).
Return bowl of dough to fridge in between baking batches.
Remove to cooling rack. Allow to cool completely.


A tip:
~DO NOT bake longer than 7-8 minutes!! They may seem under-baked, but when they cool they will firm up.
Tuesday, March 20, 2012
Tuesday's Tips, Tricks and Tid-Bits ~ Sharing Your Baked Goods
Today's post isn't really a trick or tip per se, but rather a fun and creative idea. So often baked goods are given to friends and family. They can be given as a fun surprise or given to someone going through a rough time. While these yummy goodies are certainly always appreciated and are usually gobbled up within a short amount of time, sometimes there is so much food that it can't be consumed before it spoils. And then it just ends up in the trash.
One quick and easy fix for this is to freeze the food you take to someone. That way they can pop it in the oven whenever they need and/or want to. I know it's probably not quite as excited as taking something fresh out of the oven, but this method might allow your loved one to enjoy even more of the tasty treat.
For example: this past weekend I whipped up some almond sugar cookies. The recipe made several dozen, and I knew that it was just too many cookies to take to one small family get together. I mean, we COULD have even them all (smile), but we really didn't need to.
Monday, March 19, 2012
Crock Pot Honey Sesame Chicken
I pulled out my crock pot this past Friday for the first time since getting married. Usually when I use a crock pot it's for things like soup, or for dips when the hubby and I entertain. But a slow cooker is also a great way to put together a quick and easy meal. Just put everything in it that morning, and when you come home dinner is ready!


Trey and I love both love sesame chicken and this version seemed like a great option. The honey added a nice touch of sweetness, although I will have to say that I would add even more honey if I made it a second time. In the recipe below I reduced the amount of soy so that the honey flavor would be more apparent.
I served this chicken over rice, but I'm sure vegetables or noodles would be a great option as well. Enjoy!
Friday, March 16, 2012
Easy Parmesan and Sour Cream Chicken
Today I'm featuring yet another recipe I found on Pinterest. Yes, again. I'm sorry, but I just can't help it. And you might as well get used to it, because I have this feeling that the trend will continue.
This chicken might possibly be the simplest thing I've ever made, but the short list of ingredients definitely doesn't mean it's short on flavor. I added a few herbs, but still think the parmesan could carry this dish on it's own if you didn't want to bother with them.
I also switched up the original recipe just a tad. The Enchanted Cook calls for the chicken to be smothered in mayo, but I didn't have any on hand so I used sour cream. I thought it turned out great and so did the hubby (or so he said)!

This dish is perfect for a rushed evening where you don't have much time to prep a meal and need something on the table quick. Not that I'm ever rushed or anything :)
Thursday, March 15, 2012
Baked Oatmeal for One
I had seen the idea of baking oatmeal floating around Pinterest and wondered just how different (if at all) oatmeal would taste when it was prepared in an oven versus in a microwave. Anything cooked the old fashioned way as opposed to being zapped tastes better, so I figured oatmeal would follow along with this same theory.
I also wanted to test this out so that I would know if preparing a big pan of oatmeal for a crowd in the oven might work. Oatmeal is so delicious, but the thought of microwaving a bowl of it for 6 guests is not quite as appealing.
And good Lord was I right about baking this stuff. This stuff was incredibly creamy and full of flavor. When you microwave oatmeal it can sometimes cook unevenly. I'm sure the added peanut butter didn't hurt either :)
The recipe below is just what I used, but you could definitely use plain oatmeal or another flavor. You could completely omit the oatmeal or stir in some raisins. You choose!
I realize it's a SUPER simple recipe (if you would even call it a recipe), but I still wanted to share.

Now that I know this works I'm going to try making a bigger batch to serve a small crowd next time.
I also wanted to test this out so that I would know if preparing a big pan of oatmeal for a crowd in the oven might work. Oatmeal is so delicious, but the thought of microwaving a bowl of it for 6 guests is not quite as appealing.
And good Lord was I right about baking this stuff. This stuff was incredibly creamy and full of flavor. When you microwave oatmeal it can sometimes cook unevenly. I'm sure the added peanut butter didn't hurt either :)
The recipe below is just what I used, but you could definitely use plain oatmeal or another flavor. You could completely omit the oatmeal or stir in some raisins. You choose!
I realize it's a SUPER simple recipe (if you would even call it a recipe), but I still wanted to share.

Love this photo...it kind of makes me want to lick the screen.
Now that I know this works I'm going to try making a bigger batch to serve a small crowd next time.
Wednesday, March 14, 2012
Whole Wheat Pizza Crust
Today's post comes as a result of my husband's plea for healthier dinner options :) Okay, so pizza isn't exactly healthy, but the wheat crust softens the blow a bit. While rich, creamy and dreamy meals are wonderful, they don't help one's quest for a trim and fit waistline unfortunately. Isn't that the way things always go? If it's enjoyable, then it's usually bad for you.
I had been eyeing this recipe for this amazing pizza dough for quite some time and decided to go out on a limb and use whole wheat flour instead of bread flour. While I do think that my decision to omit bread flour specifically did affect the outcome somewhat (bread flour has more gluten and produces a chewier texture), I would still say this pizza crust was a hit.
Below is a recipe for the dough only, and you can top your pizza any way you prefer. I added both gruyere and sharp chedder cheese (1 1/2 C of each), caramelized onions, tomatoes, roasted chicken and artichokes. We had received this delicious artichoke dip that I used as a sauce.
I also brushed the crust with roasted garlic and olive oil before sprinkling with salt. For the roasted garlic I simply chopped off the top of a head of garlic, poured olive oil over it, topped it with salt and pepper and then roasted it in the oven for about an hour at 425 degrees. The taste that results is out of this world!

*A side note: pizza dough also freezes really well. Just let it rise and then wrap it in plastic wrap before placing it in the freezer.
Tuesday, March 13, 2012
Tuesday's Tips, Tricks and Tid-Bits ~ Room Temperature Ingredients for a Cake
This week's "Triple T" (tips, tricks and tid-bits...get it?) post is about the importance of bringing cake ingredients to room temperature. Now of course there's always the exception, say, if a recipe calls specifically for chilled butter. But the vast majority of the time you'll want for your eggs, milk and butter to be at room temp when you incorporate them into your cake batter.
Why you ask? Because when butter is at room temperature you can cream it properly with sugar so that it will hold more air. If you try to cream cold butter with sugar you will end up with a clumpy, lumpy mess. When eggs are at room temp they will act as an emulsifier because they can be fully incorporated into the batter.
In layman's terms: when all of your ingredients are at room temperature they will produce a cake with a more tender crumb, and the cake will also rise to it's highest level and bake more evenly. And that (to borrow Martha Stewart's famous words) is a good thing.
You can achieve this by setting your eggs, milk and butter out 60-90 minutes prior to baking. *Make sure you don't set your butter out too soon or it will be too soft. When you press the butter you should be able to see your finger print indention. If you press it and the butter won't give it's too cold....if you press it and it completely squashes back it's too warm.*
But what happens when you decide spur of the moment that you want to bake a cake? Or what about when you need to start baking immediately upon arriving home from a long day's work? Luckily there are a few ways to speed up this process and cut down on your wait time.
Most people just put a stick of butter in the microwave for a bit to soften it up, but unfortunately this causes different parts of your butter to melt at different rates: the outside will be completely melted and the inside will still be solid. The best solution is to cut your butter into thin slices (the thinner the better). More surface area=faster warming time.

Monday, March 12, 2012
Chicken Cacciatore
I had seen the recipe for chicken cacciatore on The Pioneer Woman's site a few times and had been quite intrigued. I have to admit most of this had to do with the fancy sounding name. Cacciatore? If it sounded that divine and sophisticated, it must be such.
This recipe calls for chicken thighs, but you can really use any pieces of chicken you'd like. I opted for a mix of thighs and drumsticks. I'm sure you could also switch up the veggies listed if you wanted as well.
I must say this meal has a wonderful mix of textures and flavors. I opted to add crushed red paper flakes which gave the dish a bit of a spicy kick.
*Let me interrupt and say that I'm experimenting with bigger photos.....seeing how it goes....

My only gripe (if you could even call it a gripe) is that it took me a LONG time to make this. The prep/cook time listed is an hour and 15 minutes, but it too me well over two hours to make much to the chagrin of my growling stomach. Just a heads up in case you're looking to make this wonderful meal :)
Friday, March 9, 2012
Friday Links
TGIF! I'm going to revert back to a previous tradition of sharing some links around the web. One of the things I've enjoyed most about food blogging is the amazing network of other talented ladies and gentlemen who are out there. Their recipes are inspiring and their photos are simply breathtaking.
My aim (most) Fridays is to bring some of my favorite finds to you.
*Disclaimer: The below photos were not taken by me, nor do I claim to take any credit for them. Please click the accompanying link for each photo to be taken to the site whose property they are. You will also find the recipe via this same link.
Enjoy!
Thursday, March 8, 2012
White Chocolate Covered Black Cherry Oreos
Tuesday, March 6 was Oreo's 100th birthday, so in honor of the chocolate and cream sandwich cookie I thought I'd create a twist on the classic. I've often seen Oreos dipped in chocolate or coated with peanut butter (which are amazing).
I wanted to do something a little different and loved the idea of adding in a fruit flavor. I've seen Oreos paired with raspberries several times, so I settled on using the flavor of black cherries.

These little guys are very easy to assemble and I think the use of black cherry preserves make for a fun and tasty unexpected surprise. Just make sure you don't keep these things around the house for too long...they're addictive!
One thing I'd like to note about this recipe is that it isn't one of those where if you're off my a smidgen it will kill the whole thing. The ratio of preserves to powdered sugar just seemed to be what gave the fruit a firmer consistency.
And last, but not least, I wanted to point out that you might notice something different about this post....can you guess what it is?? Well, first off there is a page break and then you "read more" to get the recipe. I think this change will make for a cleaner home page.
I've also added a printable recipe link to this post. How annoying is it to have to drab your entire laptop into the kitchen just to recreate something? Well, this solution takes care of that :) I'll be working on updated all posts with this new feature, so stay tuned!
Wednesday, March 7, 2012
Strawberry Scones
My husband and I went to Durham, NC this past weekend to attend the UNC/Duke game (it was my wedding gift to him), and while we were up there I wanted to find some great local restaurants to enjoy. It's not that I dislike chain restaurants, but rather I like to try out places that can't be accessed anywhere else.
This desire led us to Foster's Market. Sara Foster is the woman behind 2 stores by the name, with one store being in Durham and the other a short drive away in Chapel Hill. I was checking out restaurants on Yelp and read that Sara Foster used to be the head of Martha Stewart's catering company. Yep, count me in.
Foster's is a quaint little store with a slightly rustic feel. It's one of those places where you immediately know the second you walk in that every single thing on their menu must be superb. Only local, fresh produce is used and the menu adapts based on what's in season.
After Trey and I enjoyed our sandwich and chicken wrap for lunch (they were both divine, by the way) I asked if he would like something for dessert. That's basically my way of saying "Okay, I'm getting something for dessert and I'd like for you to order something too so that I don't feel bad for indulging on my own". He obliged and asked for me to pick him something out.
I settled on their German chocolate cake and a chocolate chip cookie (these were divine as well). But while I was at the counter I noticed their array of homemade scones. Believe it or not I've never eaten a scone. I've admired them from the Starbucks display from time to time when I go for a coffee, but have never ventured out enough to actually eat one. When I mentioned this to Trey he commented that he didn't even know what a scone was. Oh dear. As a food blogger, this means I must be failing as a wife.
I decided to change this and whipped up a batch of scones from my Foster's Market cookbook I purchased on the same trip. We had a rather large batch of strawberries in the fridge so I decided to add these to the pastries as well.

Overall, I was pretty pleased with the way they turned out. The recipe was easy and quick, the flavor and texture was fantastic, but the only thing slightly disappointing was that they didn't hold their shape as well as I would have liked.
I'm not sure if this was because of something I did (maybe the butter wasn't cold enough), but I'm going to experiment and see if I can come up with a solution...that just means I'll have to make them again :)
Below is just a basic scone recipe, so feel free to dress this up to suit your taste. Make them with cinnamon and sugar, blueberries, lemon.....the options are endless!
Foster's Scones adapted from The Foster's Market Cookbook
4 1/2 C all purpose flour
1/2 C sugar
2 tsp baking powder
1/2 tsp baking soda
1/2 tsp salt
3/4 lb (3 sticks) cold unsalted butter, cut into 1/4 inch slices
1 1/4 C plus 2 Tbsp buttermilk
Egg wash: 1 large egg beaten with 2 Tbsp milk
Preheat oven to 400 degrees. Prepare two baking sheets by lightly greasing. Set aside.
In large bowl stir together flour, sugar, baking powder, baking soda and salt. Using a pastry cutter, cut in pieces of butter. Work butter into flour mixture until it resembles coarse meal.
*Make sure not to overwork the dough....doing so will make it tough versus light and fluffy.


If you want to add anything into the scones do so at this point (before adding the milk). I hulled and diced enough strawberries to make two cups. Toss ingredients to coat in flour mixture.

Add almost all of the buttermilk (you may not need it all). The dough should begin to get sticky and should stay together. Add the remainder of the buttermilk if the dough seems dry.
Turn dough out onto floured surface. Shape into two 6-inch rounds. Each round should be approximately 1 1/2 inches in thickness. Cut each round in half, and then cut each half into 3 triangles.


Place triangles on baking sheets and brush with egg wash. Bake 30-35 minutes. Scones should be golden brown and firm to touch.


Remove from oven and serve immediately.
This desire led us to Foster's Market. Sara Foster is the woman behind 2 stores by the name, with one store being in Durham and the other a short drive away in Chapel Hill. I was checking out restaurants on Yelp and read that Sara Foster used to be the head of Martha Stewart's catering company. Yep, count me in.
Foster's is a quaint little store with a slightly rustic feel. It's one of those places where you immediately know the second you walk in that every single thing on their menu must be superb. Only local, fresh produce is used and the menu adapts based on what's in season.
After Trey and I enjoyed our sandwich and chicken wrap for lunch (they were both divine, by the way) I asked if he would like something for dessert. That's basically my way of saying "Okay, I'm getting something for dessert and I'd like for you to order something too so that I don't feel bad for indulging on my own". He obliged and asked for me to pick him something out.
I settled on their German chocolate cake and a chocolate chip cookie (these were divine as well). But while I was at the counter I noticed their array of homemade scones. Believe it or not I've never eaten a scone. I've admired them from the Starbucks display from time to time when I go for a coffee, but have never ventured out enough to actually eat one. When I mentioned this to Trey he commented that he didn't even know what a scone was. Oh dear. As a food blogger, this means I must be failing as a wife.
I decided to change this and whipped up a batch of scones from my Foster's Market cookbook I purchased on the same trip. We had a rather large batch of strawberries in the fridge so I decided to add these to the pastries as well.

Overall, I was pretty pleased with the way they turned out. The recipe was easy and quick, the flavor and texture was fantastic, but the only thing slightly disappointing was that they didn't hold their shape as well as I would have liked.
I'm not sure if this was because of something I did (maybe the butter wasn't cold enough), but I'm going to experiment and see if I can come up with a solution...that just means I'll have to make them again :)
Below is just a basic scone recipe, so feel free to dress this up to suit your taste. Make them with cinnamon and sugar, blueberries, lemon.....the options are endless!
Foster's Scones adapted from The Foster's Market Cookbook
4 1/2 C all purpose flour
1/2 C sugar
2 tsp baking powder
1/2 tsp baking soda
1/2 tsp salt
3/4 lb (3 sticks) cold unsalted butter, cut into 1/4 inch slices
1 1/4 C plus 2 Tbsp buttermilk
Egg wash: 1 large egg beaten with 2 Tbsp milk
Preheat oven to 400 degrees. Prepare two baking sheets by lightly greasing. Set aside.
In large bowl stir together flour, sugar, baking powder, baking soda and salt. Using a pastry cutter, cut in pieces of butter. Work butter into flour mixture until it resembles coarse meal.
*Make sure not to overwork the dough....doing so will make it tough versus light and fluffy.

The flour mixture was a bit messy

Perfectly fresh and ripe...loved their vibrant color
If you want to add anything into the scones do so at this point (before adding the milk). I hulled and diced enough strawberries to make two cups. Toss ingredients to coat in flour mixture.

Add almost all of the buttermilk (you may not need it all). The dough should begin to get sticky and should stay together. Add the remainder of the buttermilk if the dough seems dry.
Turn dough out onto floured surface. Shape into two 6-inch rounds. Each round should be approximately 1 1/2 inches in thickness. Cut each round in half, and then cut each half into 3 triangles.


Place triangles on baking sheets and brush with egg wash. Bake 30-35 minutes. Scones should be golden brown and firm to touch.

Brush gently with egg wash

Tuesday, March 6, 2012
Tuesday's Tips, Tricks and Tid-Bits ~ Maximizing Store Bought Frosting
While most of the cakes and cupcakes I feature on the blog are frosted with homemade frosting, I do use canned frosting from time to time. Sometimes life gets busy and it's easier to swing by Kroger and pick up the can of Duncan Hines. And sometimes, let's just be honest here, I don't feel like pulling out the Kitchenaid mixer and all of the ingredients that go into a homemade frosting. And if that's how I feel now, I can't image how pressed for time I'll be once I add kids into the mix one day!
Let me interject here though and say that I still like the taste of homemade frosting better. The store bought stuff is made with shortening to extend it's shelf life, while the homemade stuff is usually made with butter or cream cheese. That's why there's such a taste difference.
Okay...back to my point. So how do you go about dressing up your store bought can? First off, whip it for a few minutes. You can do this with a Kitchenaid mixer or you can put it in a bowl and use a hand held mixer. Whipping it for a few minutes will incorporate enough air to actually double it in size. The result is a lighter, fluffier frosting that is easier to spread. And since there's more air in the frosting it will also have fewer calories per serving than it did straight out of the can. It's a win, win.
Another thing you can do is add a few elements of your own. Add a few softened tablespoons of butter or some cream cheese. To punch up the flavor a bit, add a teaspoon or two of vanilla, almond, lemon or mint extract. And of course you can always dress it up by stirring in chocolate chips, sprinkles and other bits of candy.
One last thing I'd like to share in this post is the addition of two new pages to the blog: one is a Recipe Index which will make it easier to navigate this site, while the other is a FAQ page that covers the questions I most commonly receive.
I'm constantly working to better both the blog in general, and also the material I bring to the readers each day. It's definitely a process (some of my earlier posts make me cringe), but it's getting there. Thanks for hanging in there with me!
Have a suggestion? Leave a comment! I'd love to hear from you :)
Happy Tuesday everyone!
Monday, March 5, 2012
Raspberry Brownie and Cheesecake Ice Cream ~ A Base Recipe
I don't know about you, but I eat yogurt and ice cream all through the cold months even though it's typically considered a "hot weather" treat. This is precisely why one of the first things I registered for at Bed Bath and Beyond was a Cuisinart Ice Cream Maker. My family gave it to me as a gift at my Favorite Things shower and I have been itching to use it ever since.
This past week presented the perfect opportunity. And by opportunity, I mean that I had some left over raspberry cream cheese brownies that I needed to get rid of before I ate every single last bite that I had left. I also had some remaining cheesecake from a date night that Trey and I had enjoyed at The Palm in Atlanta a few days before. Brownies and cheesecake in ice cream? Um, yes please.

For the base of the ice cream I used a recipe from Jeni's Splendid Ice Creams. Jeni's is based out of Ohio but ships their ice cream nation wide. I've ordered some before and must say it's hands down the best ice cream I've ever eaten. Ever. I know that's a pretty heft claim, but once you take a spoonful I'm willing to bet you'll agree as well.
I simply prepared the base, processed it in the ice cream maker, and then added my raspberry cream cheese brownies and cheesecake bits. The best thing about this recipe is that it's just a base recipe, which means you can build it whatever way you like. Add fruit, candy, chocolate, ....the list is endless. Personalize it and make it yours :)
Jeni's Splendid Ice Cream Base courtesy of Jeni's Splendid Ice Creams at Home
2 C milk
4 tsp cornstarch
1 1/4 C heavy cream
2/3 C sugar
2 Tbsp light corn syrup
1/4 tsp kosher salt
3 Tbsp cream cheese, softened
*I doubled this recipe in case you're wondering why my portions look so much larger in my photos.
Stir 1/4 C milk and cornstarch together in bowl. Set slurry aside. (Why it's called slurry I'm not sure....I'll research that one for ya.)

In 4 qt sauce pan whisk together heavy cream, sugar, corn syrup, salt and remaining milk (1 3/4 C). Bring to boil over medium high heat. Cook for 4 minutes. Stir in slurry. Continue cooking, stirring until thickened (approximately 2 minutes).

Place cream cheese in separate large bowl and pour in 1/4 C hot milk mixture from saucepan. Whisk until combined and smooth. Add in remaining milk mixture from saucepan and stir to combine.

Allow mixture to cool slightly. Pour into plastic zip loc bag, seal and submerge into bowl of ice water until chilled.
Pour mixture into ice cream maker and follow instructions from manufacturer. Pour into sealable container and place in freezer until set.
*If you want to add anything to the ice cream you need to do so AFTER you process the ice cream in the ice cream maker, but BEFORE you set it in the freezer. Just make sure you layer it and freeze as you go. Otherwise all of your added pieces will just float straight to the top. i.e. Add a layer of ice cream, top with brownies, freeze completely. Then repeat over and over.


This past week presented the perfect opportunity. And by opportunity, I mean that I had some left over raspberry cream cheese brownies that I needed to get rid of before I ate every single last bite that I had left. I also had some remaining cheesecake from a date night that Trey and I had enjoyed at The Palm in Atlanta a few days before. Brownies and cheesecake in ice cream? Um, yes please.

For the base of the ice cream I used a recipe from Jeni's Splendid Ice Creams. Jeni's is based out of Ohio but ships their ice cream nation wide. I've ordered some before and must say it's hands down the best ice cream I've ever eaten. Ever. I know that's a pretty heft claim, but once you take a spoonful I'm willing to bet you'll agree as well.
I simply prepared the base, processed it in the ice cream maker, and then added my raspberry cream cheese brownies and cheesecake bits. The best thing about this recipe is that it's just a base recipe, which means you can build it whatever way you like. Add fruit, candy, chocolate, ....the list is endless. Personalize it and make it yours :)
Jeni's Splendid Ice Cream Base courtesy of Jeni's Splendid Ice Creams at Home
2 C milk
4 tsp cornstarch
1 1/4 C heavy cream
2/3 C sugar
2 Tbsp light corn syrup
1/4 tsp kosher salt
3 Tbsp cream cheese, softened
*I doubled this recipe in case you're wondering why my portions look so much larger in my photos.
Stir 1/4 C milk and cornstarch together in bowl. Set slurry aside. (Why it's called slurry I'm not sure....I'll research that one for ya.)

In 4 qt sauce pan whisk together heavy cream, sugar, corn syrup, salt and remaining milk (1 3/4 C). Bring to boil over medium high heat. Cook for 4 minutes. Stir in slurry. Continue cooking, stirring until thickened (approximately 2 minutes).

Place cream cheese in separate large bowl and pour in 1/4 C hot milk mixture from saucepan. Whisk until combined and smooth. Add in remaining milk mixture from saucepan and stir to combine.

Pour mixture into ice cream maker and follow instructions from manufacturer. Pour into sealable container and place in freezer until set.
*If you want to add anything to the ice cream you need to do so AFTER you process the ice cream in the ice cream maker, but BEFORE you set it in the freezer. Just make sure you layer it and freeze as you go. Otherwise all of your added pieces will just float straight to the top. i.e. Add a layer of ice cream, top with brownies, freeze completely. Then repeat over and over.

Cutting up the raspberry cream cheese
brownies and cheesecake into bite sized pieces

Layering the ice cream and added ingredients

This is my husband's bulldog, Moe. She was not happy
that I was keeping her up past her bedtime. Can
you tell?? :)

Mmmmmm

Add some fresh raspberries to the dish to
brighten the flavor

Friday, March 2, 2012
Raspberry Cream Cheese Brownies
Did the title reel you in? How heavenly do these sound? Brownies are always fabulous, raspberries might be my favorite fruit and cream cheese of course is a gift from God Himself. So the thought of combining all of these things into one dish just blew my mind.
I'm a very big fan of boxed brownies, so the decision to make some from scratch was not a light one. If the boxed variety works so well, why bother going through all the motions just to come out with the same thing? Well, that's where these brownies differ.
I don't know how to explain it, but they have a completely different texture than boxed brownies do. The raspberries perfectly complement the dark chocolate, while the cream cheese add the perfect amount of softness to the brownies.

My other favorite thing about these brownies is that they could be easily adapted to suit your taste. Don't like raspberries? Use strawberry jam. Try out orange. Get creative and find the combo you love!
Raspberry Cream Cheese Brownies courtesy of Brown Eyed Baker
8 oz cream cheese at room temp
1 1/2 C granulated sugar, divided
1 egg yolk
2 1/4 tsp vanilla extract, divided
2/3 C all purpose flour
1/2 tsp baking powder
1/2 tsp salt
8 Tbsp unsalted butter, cut into pieces
4 oz unsweetened chocolate, chopped
1/2 C raspberry jam, divided
3 eggs
Preheat oven to 350 and line 8 inch square baking pan with parchment paper along the bottom of the dish. Lightly grease the dish.

Process cream cheese, 1/4 C granulated sugar, egg yolk and 1/4 tsp vanilla in food processor until smooth (I used a hand held mixer in a separate bowl). Set aside.

Whisk together flour, baking powder and salt in small bowl. Set aside. Microwave butter and chocolate in separate bowl until melted and smooth, opening microwave periodically to stir. Whisk 1/4 C raspberry jam into chocolate mixture and whisk until smooth. Allow to cool slightly.
Add remaining 1 1/4 C sugar, the 3 eggs, and remaining 1 1/4 tsp vanilla to chocolate mixture, stirring until combined. Add flour mixture and stir until incorporated.
Microwave remaining raspberry jam until smooth and slightly melted (about 30 sec). Stir to smooth and cool. Scrape half of brownie mixture into pan, top with cream cheese mixture. Smooth out to get even. Then top with raspberry jam. *This is where I added my layer of fresh raspberries. Spread remaining brownie batter over top.


Bake 50-60 minutes or until toothpick inserted comes out clean. Cool completely (approximately 2 hours) before removing from pan.

I'm a very big fan of boxed brownies, so the decision to make some from scratch was not a light one. If the boxed variety works so well, why bother going through all the motions just to come out with the same thing? Well, that's where these brownies differ.
I don't know how to explain it, but they have a completely different texture than boxed brownies do. The raspberries perfectly complement the dark chocolate, while the cream cheese add the perfect amount of softness to the brownies.

My other favorite thing about these brownies is that they could be easily adapted to suit your taste. Don't like raspberries? Use strawberry jam. Try out orange. Get creative and find the combo you love!
Raspberry Cream Cheese Brownies courtesy of Brown Eyed Baker
8 oz cream cheese at room temp
1 1/2 C granulated sugar, divided
1 egg yolk
2 1/4 tsp vanilla extract, divided
2/3 C all purpose flour
1/2 tsp baking powder
1/2 tsp salt
8 Tbsp unsalted butter, cut into pieces
4 oz unsweetened chocolate, chopped
1/2 C raspberry jam, divided
3 eggs
Preheat oven to 350 and line 8 inch square baking pan with parchment paper along the bottom of the dish. Lightly grease the dish.

Chopping the dark chocolate...I might have
snuck a bite ;)
Process cream cheese, 1/4 C granulated sugar, egg yolk and 1/4 tsp vanilla in food processor until smooth (I used a hand held mixer in a separate bowl). Set aside.
Whisk together flour, baking powder and salt in small bowl. Set aside. Microwave butter and chocolate in separate bowl until melted and smooth, opening microwave periodically to stir. Whisk 1/4 C raspberry jam into chocolate mixture and whisk until smooth. Allow to cool slightly.
Add remaining 1 1/4 C sugar, the 3 eggs, and remaining 1 1/4 tsp vanilla to chocolate mixture, stirring until combined. Add flour mixture and stir until incorporated.
Microwave remaining raspberry jam until smooth and slightly melted (about 30 sec). Stir to smooth and cool. Scrape half of brownie mixture into pan, top with cream cheese mixture. Smooth out to get even. Then top with raspberry jam. *This is where I added my layer of fresh raspberries. Spread remaining brownie batter over top.

Fresh raspberries over top the cream cheese

And the final layer of chocolate batter...

Layers of chewy, moist goodness
Thursday, March 1, 2012
Fancy Baked Macaroni and Cheese
This past weekend Trey and I went back up to my hometown to have lunch with my sweet family. They only live 30 minutes away but my chances to get to see them all at once are few and far between due to everyone's crazy schedules. Like most families, when we get together we just want good 'ole comfort food.
Biscuits? Check. Green Beans? Check. Macaroni and cheese? Well, my grandmother normally makes this, but she was tied up that morning so I told her I would take the dish over for her. I scoured the internet looking for a great, fool-proof recipe and finally settled on one from The Pioneer Woman. I always love her dishes, and really, how hard can it be to mess up macaroni and cheese?
This isn't your traditional macaroni and cheese, as it uses a blend of cheese and also adds in bacon and onions to richen the flavor. But since I had those cracklings left over from my homemade lard that I featured yesterday I decided to use those in place of bacon.

PS So sorry for the less than plentiful collection of pictures (okay, there's only one) in this post. I was whipping this dish up in a hurry and didn't have enough time to take the kind of pics I wanted :(
Fancy Macaroni and Cheese courtesy of The Pioneer Woman
4 C macaroni
8 Tbsp butter (salted butter this time)
2 medium onions, cut in half and sliced thin
10 slices regular bacon
1 Tbsp bacon grease (reserved from bacon drippings)
1/4 C all purpose flour
2 C milk (whole or 2%)
1/2 C half and half
2 whole egg yolks, beaten
Salt and pepper, to taste
1/2 C grated Gruyere cheese
1/2 C grated Fontina cheese (I used extra sharp cheddar)
1/2C grated Parmigiano Reggiano cheese
4 oz soft goat cheese
***I would like to add that while I LOVED the flavor of this recipe, I would have made more of the cheese/milk mixture (or I guess you could reduce the amount of macaroni pasta you added). I like my mac and cheese really creamy and this was a bit "dry" for me. Not bad in the least, but just something to note.
Preheat oven to 350 degrees. Cook macaroni for half time recommended on box (or until it's almost done, but not quite). Drain and set aside.
Fry bacon until just crispy. Set aside on paper towels and reserve grease.
Melt 4 Tbsp butter in skillet and saute onions over medium-low heat for 10-12 minutes, or until onions are slightly brown and soft. Set aside.
In pot melt 4 Tbsp butter and 1 Tbsp reserve bacon grease. Sprinkle in flour and whisk to combine. Stir constantly over medium heat for 1 minute. Pour in milk and half and half and cook for 3-5 minutes until thickened. Reduce heat to low. Salt and pepper to taste.
Beat egg yolks and temper them by pouring 1/4 C hot milk mixture into egg yolks, stirring constantly until combined. Pour egg yolk mixture into milk mixture. Cook for 1 additional minute.
Add cheeses and stir until melted and combined. Add onion and bacon. Stir. Add cooked macaroni and toss to coat. Add additional salt and pepper if needed.
Pour into baking dish and bake 15-20 minutes or until hot and bubbling.
Biscuits? Check. Green Beans? Check. Macaroni and cheese? Well, my grandmother normally makes this, but she was tied up that morning so I told her I would take the dish over for her. I scoured the internet looking for a great, fool-proof recipe and finally settled on one from The Pioneer Woman. I always love her dishes, and really, how hard can it be to mess up macaroni and cheese?
This isn't your traditional macaroni and cheese, as it uses a blend of cheese and also adds in bacon and onions to richen the flavor. But since I had those cracklings left over from my homemade lard that I featured yesterday I decided to use those in place of bacon.

Dig in!!
PS So sorry for the less than plentiful collection of pictures (okay, there's only one) in this post. I was whipping this dish up in a hurry and didn't have enough time to take the kind of pics I wanted :(
Fancy Macaroni and Cheese courtesy of The Pioneer Woman
4 C macaroni
8 Tbsp butter (salted butter this time)
2 medium onions, cut in half and sliced thin
10 slices regular bacon
1 Tbsp bacon grease (reserved from bacon drippings)
1/4 C all purpose flour
2 C milk (whole or 2%)
1/2 C half and half
2 whole egg yolks, beaten
Salt and pepper, to taste
1/2 C grated Gruyere cheese
1/2 C grated Fontina cheese (I used extra sharp cheddar)
1/2C grated Parmigiano Reggiano cheese
4 oz soft goat cheese
***I would like to add that while I LOVED the flavor of this recipe, I would have made more of the cheese/milk mixture (or I guess you could reduce the amount of macaroni pasta you added). I like my mac and cheese really creamy and this was a bit "dry" for me. Not bad in the least, but just something to note.
Preheat oven to 350 degrees. Cook macaroni for half time recommended on box (or until it's almost done, but not quite). Drain and set aside.
Fry bacon until just crispy. Set aside on paper towels and reserve grease.
Melt 4 Tbsp butter in skillet and saute onions over medium-low heat for 10-12 minutes, or until onions are slightly brown and soft. Set aside.
In pot melt 4 Tbsp butter and 1 Tbsp reserve bacon grease. Sprinkle in flour and whisk to combine. Stir constantly over medium heat for 1 minute. Pour in milk and half and half and cook for 3-5 minutes until thickened. Reduce heat to low. Salt and pepper to taste.
Beat egg yolks and temper them by pouring 1/4 C hot milk mixture into egg yolks, stirring constantly until combined. Pour egg yolk mixture into milk mixture. Cook for 1 additional minute.
Add cheeses and stir until melted and combined. Add onion and bacon. Stir. Add cooked macaroni and toss to coat. Add additional salt and pepper if needed.
Pour into baking dish and bake 15-20 minutes or until hot and bubbling.
Subscribe to:
Posts (Atom)